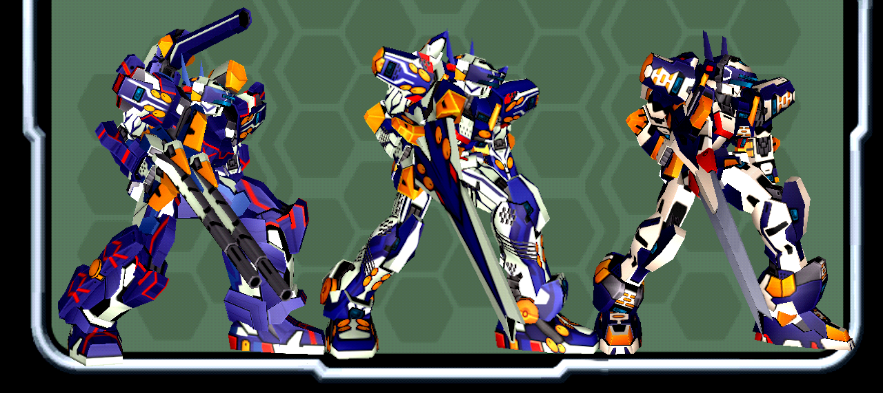
VIRTUAL-ON MARZ
Would you know? I actually enjoyed the game a fair bit, even if there were some annoying sections here and there. If someone from Japan reads this, they may even call me MARZ dog lmao [the japanese version has the antagonist call you that at times...and it seems to have become a joke for some in Japan about MARZ players]
Strap in, because for this one, I actually took the time to play through most of the game to know what I'm talking about. Ups and downs and everything in between. Also, big shout outs to TemYap's guides at GameFAQs - despite being from 2003, those were by far the most detailed pages about Marz I've found to this day in English.
Oh, and this is recent, but I finally made a Boss Analysis video about White Knight - I put a lot of time into it to detail the most I could about that fight, so it should be a fairly complete watch for something MARZ-related that isn't a gameplay video without commentary.
Oh, and since I played the Japanese version just for the original voices [even though I won't understand the story written, but I've heard its often nonsensical anyways so I guess I'm not missing much] - Takenobu Mitsuyoshi as Hatter sounds funny but it actually works so well, even more evident if you watch the Opening with Hatter's voice in the Japanese version [Hatter's voice in the Opening is only available if you let it play after completing the final mission in Dramatic Mode, and will stay in effect until you turn off/reset the PS2].
A little bonus I found on my own at NicoVideo is that [at least in the Japanese version, not sure if works in NTSC-U] special attacks, if used at the right time while fighting Z-Gradt in Mission 1-5, can lead to one phase kills if the special attack hitbox is inside Z-Gradt right as the cutscene of Hatter being hurt plays [with the hitbox visibly staying active while the cutscene plays]. Although according to description, this will not work with any special attacks that are specifically melee type [which makes sense as Z-Gradt is impervious to them, and is also why the 747HII Blitz Torando can't be used for it and isn't shown in that video].
MARZ VS FORCE - Arcade/Challenge Mode Differences
Force has the expected arcade ladder in all versions [with the Arcade ver. having occasional missions to be enabled in the Terminal, and the X360 port having them accessible on a menu - the PS4 versions seems to have removed the missions altogether but compensated with having every VR unlocked from the get go], but as MARZ features the single player Dramatic Mode first, it is less known that MARZ actually has an arcade mode [Challenge].
MARZ's Challenge mode [the name I'll use for it now] is mostly based off Force's, but the main differences are either reusing new stuff added in MARZ or replacing absent stuff from Force. You can actually use a variety of VRs from the get go without unlocking them in Dramatic Mode [all the default playable VRs in Force, including the Temjin 707 which was the default in Arcade 7.5], but you need to unlock them in Dramatic Mode to use their alternate colors.
STAGES AND ORDER
- Instead of Force's 10 fights [8 missions and 2 bosses], MARZ has 12 fights [9 missions and 3 bosses].
- MARZ has Jaguarandi in Fight 4 and Ajim/Guerlain in Fight 8, while Force has Jaguarandi in Fight 5 and Ajim/Guerlain in Fight 10 [final].
- As Ajim/Guerlain are no longer the final boss, the 12th and final fight in MARZ is against two Z-Gradts at once.
- Arctic Base, Strongpoint, Central City and Artificial Lake [first 4 stages in Force] now instead have a chance to appear in Mission 9 and 10 at random.
- Martian Sanctuary is completely absent in MARZ, so it will not appear. Fei-Yen (and possibly Angelan) will appear on a MARZ stage at Mission 3 instead of Mission 55.
- Orbital Tube and Descent Platform are the only ones that are still present in their order [next two fights after Jaguarandi]
- Next stage after Descent Platform is either Rusty Rig or a new MARZ stage.
OTHER
- In a rare but noticeable MARZ benefit, you can skip the intermission before fights...as long as the game already has loaded everything to allow you skip. What's more, if you lose, because MARZ doesn't reassign you a new partner, you can immediately retry the fight. This is unlike Force, which due to the necessity of displaying every Virtuaroid's information [as in versus matches, this would display player's names and card info] including the partner VR changing on each retry, will ALWAYS show the unskippable intermission every time you start or retry a fight, even if you're playing alone.
- Since most of the Temjin series seems to be player exclusive, only having the MARZ color [not counting the CPU only Shadow fight in Dramatic Mode], you won't see them in Challenge Mode. This includes the 747HII, which contrasts the original 747H that had a chance to appear in Force's ladder [and is absent in MARZ].
- Since a lot of Virtuaroid variants are missing in MARZ, most fights are VS singular models, unlike Force which often had unlockable variants as enemies.
- Ajim and Guerlain shoot fewer crystals on the first two phases in Normal difficulty [also applies to Dramatic Mode]. If playing in Hard or higher, they shoot the same amount they always do in Force.
- MARZ gives a rank for your run at the end, which is saved along the final time on the results screen, and can even save the demo sequence to rewatch it with the individual times shown.
My Virtual-On Runs
DRAMATIC MODE TIPS AND TRICKS
There's a lot I could talk about, but most of that is tied to the Heal-less Challenge I did for my first run in MARZ, so I'll instead go here about some stuff that came very handy during that [as mission-specific strategies will go into their dedicated section].
Play Earth Missions before Moon
If you beat the Rose Sisters on their first fight, you'll play the Earth missions after Jupiter instead of the Moon missions. This means you can get the Temjin 747HII before the Moon missions.Play Moon Missions before Earth
If you lose against the Rose Sisters on their first fight, you will be sent to the Moon missions after Jupiter instead of Earth. This means you can get the Temjin 747J before the Earth missions.Randomized Missions
Some missions [mainly at Moon and Earth] will change stage and objective if you exit and re-enter the mission. This is VERY useful if you want to skip the Truck Escort missions at Earth, having a chance to get the less cumbersome satellite defense missions instead.Get Daimon Fragments early
Episode 6 requires you to get seven Daimon Fragments - but winning the first Rose Sisters fight and the Hatter fight in Episode 5 will give you one each before playing Episode 6.Retry Mission that would progress after losing
If you lose in certain fights [Rose Sisters 2-3, White Knight, Hatter], pausing and hitting Retry before the cutscene that ends the mission lets you try again.Retrying in Multi Area Mission
Some missions [like 2-5, 7-4 and 7-5] will put you on the last room you reached if you retry [lose or from pause menu] instead of from the very beginning. This will often be available in particularly lengthy missions separated by rooms.Switch VR during Multi-Area Mission
If a mission lets you retry while returning you to a later room instead of the very beginning, you can swap your Virtuaroid if you choose VR Select AFTER losing and still get sent to the last room you were at. If you choose VR Select from the pause menu though, you'll be sent to the start.Saving in Episode 6
You can save in Episode 6 at any point, even keeping any Daimon Fragments you won if you save and then load that save. If you save, reloading that same save will have area bosses appear in the same spot no matter how many times you reload [so if you saved, played the Moon Area and there's a MLTN awaiting there, then every time you reload that save there will ALWAYS be a MLTN in the Moon Area until you win or lose against it and save].Daimon Fragments in Episode 6
Episode 6's objective is to get seven Daimon Fragments before the percentage fills out. Besides being able to save and load without issues when you get one, the amount of fragments depends of the amount of fights you have to do in an area. The only exception is Hatter, who will only give you a full set of rescue disks instead of fragments.
DRAMATIC MODE: THE NO HEALING/NO RESCUE DISKS CHALLENGE
Self-imposed suffering and pushing the limits of what developers may have expected you to do while playing...talk about a potential Youtube video.
This is exactly what it says on the tin: Trying to complete as many missions in Virtual-On MARZ without using a single Rescue Disk to heal mid-mission.
As of writing this, I achieved this in ALL but two missions in Hard difficulty. There's a chance one of those I couldn't do might be a bit more doable in Normal [only if the minibosses on it take more damage], while the other one I currently skipped IS possible but with a very low margin for error, so I'll revisit that one later.
Mars - Episode 1
Read Details
Obviously the easiest episode, but Mission 1-4 is already a skill check by having to deal with six Virtuaroids with one bar [even if four of them are weak 10/80adv, its the two Temjin 707J you have to respect]
Mission 1-5 is saving Hatter from Z-Gradt, but if you want the good route, you MUST win by the third one before Z-Gradt fires at Hatter again to rescue him without healing. Might not be possible in Very Hard/Ultimate due to increased durability.
This can be done with the starting Temjin 707S - You need to use standing shots as much as you can then use Surfing Ram before the gold phase end.- First time, you use standing shots until Hatter gets shot, in that moment you use the Surfing Ram before you lose your chance.
- Second time, you use shots until jumping once over Z-Gradt's beam [you can fire mid-air]. After you land, prepare for Surfing Ram.
- The third time, you MUST have Z-Gradt with low enough health that some standing shots and a quick Surfing Ram before it shoots at Hatter again can finish the job.
Saving Hatter isn't MANDATORY in the game, but you'll definitely appreciate playing the route where he lives later on in this challenge.Jupiter - Episode 2
Read Details
This is where the cracks begin to show and you'll have to endure some punishment. There's a few multi-VR fights and one fight between rooms, but the two pain points are arguably the Rose Sisters [it's a 2v3 fight, but after one or two are defeated, Hatter will get hurt in a cutscene and the two that died will revive [albeit with far less durability], so there's a chance you lose him there and be up in a 1v3. If they beat you, pause and retry immediately before the cutscene plays, or else you're out of luck to retry the mission if you didn't save beforehand.
There's also Ajim and Guerlain as the bosses of this episode...and you'll just need to learn how to dodge the bosses attacks the old fashioned way [dashing might work, but for me jump cancels seem a bit more effective] until they go to the center and fuse - in that moment you have to use your best attacks [or an Uppercut CC]...and then avoid the beams as much as possible.
Sticking to whoever you have targeted after they reappear and using melee attacks may have a slight chance of you somehow avoiding most of their attacks, which could save you in case you can't beat them on the second fuse and have to endure a third barrage. I had to learn strats against these two because of the Challenge Mode 1CC grind, so this fight is essentially the same as if you were in Challenge Mode where you can't heal anyways.
Also, something I didn't know until I read the FAQ aqain is that there's actually a Mission 2-4 that gets skipped if you save Hatter and defeat the Rose Sisters...so that explains why I noticed I couldn't find footage of Mission 2-4 from what I had recorded.
Episode 2 without healing [Temjin 707S - Hard Difficulty]Split paths
If you won against the Rose Sisters, you'll get sent to Earth after the Jupiter missions - otherwise you'll get sent to the Moon.. There will be some uphill fights awaiting, but you'll get the Temjin 747HII after completing this mission which will come VERY handy for some Moon missions...and you'll also get a collectible [Daimon Fragment] early that will save you a bit of time later on in Episode 6.
And yes, while TemYap's FAQ says you need to also save Hatter, it actually has no bearing on getting to Episode Earth early - whether he died or not, I tested and only the outcome after the Rose Sisters fight actually changed the route.Earth - Episode E
Read Details
Most early missions will be randomized, so you will get some stage, enemy and even objective differences if you end up quitting a mission and returning - saving after each mission is advised, and besides one exception I'll go into now, I will only focus on non-randomized mission startegies. For the rest of fights that are randomized, you'll have to manage as well as you can [if it's a 1v3 for example, make use of obstacles to defend from them until you can take two of them out].
I'll be blunt: If you run into a Truck Protection mission, I would recommend exiting back to mission select screen and try again, because those are as slow as they are a massive liability to deal with AT ALL (let alone without heals), as you can easily get unlucky with VRs getting aggressive with the truck yet dodging you effortlessly and losing time...or being attacked by one and risking death while the other one is still bothering your truck. So...JUST AVOID THESE MISSIONS ALTOGETHER. Even the Truck Attack missions can be a headache because you're targeted by the other two VRs while you try to destroy enough trucks.
You can get Satellite Defense missions instead which may not be easy but are far more manageable and simple in premise to pull off without healing than the truck escorts [and the Satellites can take more punishemnt] as you only have to defend it until time runs out. I heard there's Truck Attacking missions, but I didn't get them ever during my playthrough. You may even get lucky to get Satellite ATTACK missions [I got a Satellite Attack mission on my Ultimate revisit] which should be easier as they should end when you destroy all the targets regardless of how many Virtuaroids are left.
The Rose Sisters return here, but if you can damage them enough, Hatter will also return to fight alongside you - the arena is also fairly large so you can use that to your advantage.
Z-Gradt also returns, and with a more durable gold phase on the first cycle, but if you could manage Z-Gradt in 1-5 alone, you sure can manage with Hatter tagging along now...with the caveat that he will ditch you after this mission, so the rest is up to you.
There's more random missions after this up until Mission 14, where you fight Jaguarandi. ALONE. And this is so bad that it will merit its own heading. The rest of the missions are fighting without a HUD [M15], dealing with Daimon Orbs with only your melee attacks enabled [M16], a long fight with Daimon Orbs and enemies until you reach two turrets to destroy at the end [M17] which is quite tough, and then the final one at Mission 18 which is vs...Daimon Worm, which also warrants his own heading.
All Earth Missions without healing [Temjin 707S/V - Hard Difficulty]Earth Boss - JAGUARANDI
Read Breakdown
A boss that's usually only fought with two players, whether in Force's arcade ladder or in MARZ's Challenge mode, someone on the developer team thought it would be funny to make you fight this humongous thing on your own. Altough if you intentionally lose five times against it [must get Mission Failed screen, retrying from pause menu early doesn't work], White Knight will appear to help you fight it, making it a much more manageable fight...but I'll continue describing it as if this wasn't possible [because I did NOT know that was a thing until reading the FAQ again, so I grinded for beating Jag alone].
It can easily inflict overkill with its spread lasers, and the floating bomb can remove your weapons temporarily, but the most dangerous is somehow the bazooka shot that is pretty fast, yet has a HUGE size AND damage, making it infinitely more deadly than Jaguarandi's missiles in the first Virtual-On game. Add to that the fact that you're a smidge slower in MARZ [and that you will be lacking the 747J due to the Jupiter > Earth route], and it you have the recipe for an infuriatingly easy fight to mess up and die if you're trying to do it without healing and without the White Knight as a partner. With how likely the Temjin 707S/V will be your most balanced choice for mobility and some slight durability, you will have to make use of the forward dash shots if you want to get some actual damage against this bastard.
What's even more unbelievable, is that even in Normal difficulty, apparently you can end up fighting TWO JAGUARANDI AT ONCE INSTEAD OF ONE. I didn't actually know this was possible until I ran into a video at Nicovideo of some insane players defeating both of them without healing [NO DATA as Temjin, Kanohara as Myrz]]. The existence of these videos shows it is somehow possible to beat both at once despite how insane the idea is [and I HAVE tried to do the VS 2 Jag mission in Force without EX Points to no avail], but the possibility of fighting both in the first place might be tied to your ranks on previous missions in the first place [and I don't know if it tallies up EVERY mission or only the ones in Earth to determine if you get 2 Jaguarandi instead of 1].
...Although Kanohara also happens to have a video using the White Knight and defeating BOTH JAGUARANDI WITHOUT TAKING DAMAGE. First with the White Knight as a partner and then solo. Pretty impressive, even if it also speaks to how absolutely broken White Knight as a playable character seems to be when the dash shots do CONSIDERABLE damage to either Jaguarandi while being able to escape quickly their attacks.
No Heal VS Jaguarandi [Temjin 707S/V - Hard Difficulty]Earth Boss - DAIMON WORM
Read Breakdown
Theoretically simple with only two attacks: One where he moves and shoots small lasers at where you are, and another one where it stands vertically and uses the same spread beam the Daimon Orbs use [but Worm's will temporarily disable your weapons as well]. It has a third attack where it extends and spins, but it only gets used if you are too close to it.
Unfortunately, since you'd only be with the Temjin 707S/V at this point [likely other Virtuaroids too, but I don't know which ones would be as well-balanced] as you'd only unlock the 747HII AFTER this mission, you have a very rough fight to endure: The tracking lasers add up on damage fairly fast if you let them hit you, and the spread beam is devastating both in damage and in effect - you NEED to somehow escape most of its attacks while retaliating with decent damage to end the damage faster, which is easier said than done, but after a lot of trial-and-error, I could pull off with forward dash shots and a fair amount of practice + luck to somehow not get hit a single time by that cursed spread laser.
Also, at least in Hard [probably not in Normal], it will drop a Daimon Orb when it's on low health. I could bet there are difficulty differences overall...because in Ultimate [from what I tested], it can end up dropping up to THREE ORBS if you don't dispose of them while fighting Daimon Worm [which is likely when you already have a lot to deal with its BS even when you can heal].
No Heal VS Daimon Worm [Temjin 707S/V - Hard Difficulty]Moon - Episode M
Read Details
Somewhat straightforward to describe - most of the missions are against multiple VRs or against a few Shadow VRs. You have to play really carefully to clear the multi-VR fights as you need to spare health for the last few having more endurance, while Shadow VRs in general are a massive menace to deal with due to their increased damage, although you'll initially only fight one, then when you are forced to fight two at once, White Knight will appear as a partner if you lose half your health during the mission...and then you'll go into the mission where you fight it - covered on its own section.
After that though, it's going through some more Shadow VR fights with White Knight as the partner [it may be dumb at times, but if it decides to fight decently, it can actually put a dent into Shadow VRs as fast as it can destroy you in a fight] until Mission X, where it will watch as you're in a mirror match with your own Shadow...meaning that whoever VR you choose will always be your Shadow opponent. This will be harder than you think, unless you're using an intentionally weaker or slower VR so that the CPU has less of a chance to obilerate you quickly
High speed VRs are a larger liability to deal with as Shadow VRs compared to slower ones because they have way better chances to abuse their input reading dodges, forcing you to fish for specific oportunities or use tricks such as using Temjin's forward dash-shots midair to increase the chance of the enemy fastfalling into one of the shots by accident [if you do it from ground, they'll jump without fastfalling, so you won't land them otherwise without luck or specific timing].
After you defeat Liquid Yourself ["I'M YOU!! I'M YOUR SHADOW"], you have one more mission against more Virtuaroids where your HUD is disabled and where the last spawn will always be a Daimon Orb, and then after that, it's time to fight Daimon Arm in the final Moon mission.
All Moon Missions without healing [Temjin 707S/V + 747HII - Hard Difficulty]Moon "Optional" Boss - WHITE KNIGHT
Read Breakdown
It is an "optional" boss because you will have to fight him in Mission 7...but it isn't mandatory that you win at all, as there's an extra snippet of dialogue from the narrator only if oyu lose, and you don't get a penalty or side effect later on. The only thing you miss out for not winning would be the points for doing so [and as a result, get the worst rank]. Also, the arena will often be different in each playthrough, but whatever arena you got for this fight will ALWAYS be the same if you saved on this mission no matter how many times you reload the save.
That said, I took it as a challenge to assume that I HAVE to win against this overpowered Temjin...and hoo boy, it's takes some real endurance to do so.
See, whatever strengths you have with most Temjins is eclipsed by White Knight's custom Temjin having double the power on it. If you only have the 747HII, it pales in effective range and damage compared to WK's standard bomb [and the 707 bombs are similar but infinitely worse in damage - only the 747J has a decent damage bomb and you can't use it until you complete Episode Moon once].
Your Temjin can use one or two sword slashes for a sliver of damage? White Knight can casually throw out like, four in a row quickly and they deal some nasty damage on hit.
The most damaging move this thing has is straight up most of the Temjin's strongest move as well: The forward dash shots. Get hit by one of these and you're losing around a third of of your health. You'll really notice how busted White Knight's is when yours does "decent damage" at him (a small but visible chunk of health) - and that is if you can even land hits on it.
As White Knight's CPU is cranked to maximum regardless of difficulty, you'll essentially get the Virtual-On Force experience...by dealing with an infuriatingly evasive enemy: Forward dash shots are almost always guaranteed to be dodged unless you use it at a good moment [either to counter WK's own dash shots or use it behind a wall and hope you get lucky with them], and with how it is the fastest Virtuaroid IN THE ENTIRE GAME [closest you can experience to that with other VRs being by getting a Speed powerup item, but there's no boxes in WK's fight that could drop one], depleting its health is already an uphill battle - let alone doing so without relying on healing out of a bad situation.
If you're using a heavy mech like Raiden or the 747HII, you may have chances to trade with your weapons if WK decides to try dashing at you along a wall, but otherwise, you really have to make use of your movement and keep you eyes on him at all times if you don't want to get surprised by deadly dash lasers.
The only good thing that comes out of fighting this if you're really willing to endure that pain, is the satisfaction of essentially defeating an overpowered character with your own...and also, if you can endure the entirety of Ultimate, actually unlocking him as a playable character. There's also the videos by ernostar on Youtube defeating WITH A PERFECT the White Knight with several Virtuaroids, even with the damn Vox Lee [which if you don't know, is basically CPU fodder with ONE weapon] and the nostalgic but very disadvantaged 10/80adv.
VS White Knight No Repair [Temjin 747HII - Hard - No Music]Moon Boss - DAIMON ARM
Read Breakdown
Awaits at the last mission of the Moon episode - potentially less annoying than Daimon Worm by a noticeable margin, but still can easily turn the tables at you if you don't get to dodge enough of its attacks while dishing damage back at it.
The 747HII is actually the reason why I recommend going for Earth before Moon [besides how, at least for the sake of challenge, saving Hatter and beating Rose Sisters is already mandatory plus helpful later], as it is far more doable to use against Daimon Arm with its stronger armor and raw damage for anytime it stands still.
That, and if you're lucky or cunning to somehow get it to float above one of the obstacles and approach it, Daimon Arm can actually get stuck spinning in place above you, as it tries to constantly use the melee attack while you're in range...but since it's higher vertically than you, it ends up whiffing constantly while you have a chance to use ground melee attacks until it explodes. Although I don't know if any VRs may be tall enough to make this trick not work, but I know I got it by accident on the Ultimate run with the HII.
VS Daimon Arm No Repair [Temjin 747HII - Hard]Mars Polar Area - Episode 5
Read Details
Where do I even start with this episode...to say that you'll face the most troubles here to win without healing is an understatement [only rivaled by one or two missions in the final episode]. Most of the missions are long ones, so good luck keeping your patience together after every retry, too.
MISSION 5-1: The biggest nuisance is having to retarget for the ERL cannons coming constantly - at first they are few, but soon there’s a lot of them attacking the satellites, and at least one or two target you specifically. If you can hold out for long enough though, a partner will arrive and buy you time to run and attack the Bal-D Meora on the other side of the large area.
Also, I tested that you CAN’T destroy Bal-Bados until the partner appears, as it will have impossibly high armor to be able to make a dent at it no matter what attacks you use. So you HAVE to play defending the satellites until the partner tags in to let you run off at Bal D Meora. Note that it will be fairly evasive, so use any strats you know to secure landing hits at cheap CPUs.
You MUST defend the satellites as best as you can though, because if you let the task to the CPU partner while only one satellite is remaining, there's a chance it will let a few cannons slip, let the last satellite be destroyed...and force you to fail and retry the mission while you're fighting Bal D Meora. It didn't happen to me in my Hard Heal-less run, but did happen in an Ultimate run [AND PCSX2 DECIDED TO FREAK OUT AND SOFTLOCK ON THE MISSION AFTER THIS SO NOW I HAVE TO DO IT AGAAAAAAAIIIIIIIIIIIIIIIIIIIN]
MISSION 5-2: Another somewhat annoying mission, having to run around a huge area with fog that reduces visibility - you need to turn and check on each small passage to see if you find enemy satellites in there to destroy them and open a door [each section has two, and when both are destroyed the GPS will appear to point you in where’s the exit door]. If you haven’t noticed up to this point, the controls aren’t exactly made for smoothly turning and running repeatedly over environments like this [besides the Watari Dash tech].
And of course, it isn’t *just* finding the satellites, as sometimes you’ll run into Specineffs instead. Deal with them as safely or quickly as you can and move on to search for the next area. The only saving grace is that despite how the mission itself is a slog, the only threats being Specineffs means that as long as you dispatch of them quickly [which is easier with them due to their low health], you should have no problem beating this without healing if you got this far.
MISSION 5-3: Absolute BASTARD of a mission to beat without healing. While I don’t know if it’s possible to do it with other less durable mechs after several attempts with the 747J, it gave me the impression that only the Temjin 747HII of all mechs can actually pull this heal-less successfully, or at least is the one that should struggle the less than the others [theoretically, Raiden could do it too, but that slow speed will hurt your chances to reach the turrets without getting jumped].
Issue with this one is that with ONE healthbar, you have to beeline for turrets in three areas - but Apharmds will appear to bother you [only a total of four or five spawn in the first area, but afterwards they will spawn endlessly when near the double turrets in the second and hitrd area]. The HII armor and damage is useful to deal with the turrets faster while enduring better attacks from the Apharmds whenever they notice you attacking the turrets.
It is a royal pain to pull off, as any major mistakes before reaching the final two turrets will likely spell doom. You MUST prioritize getting to the turrets above anything in the second and third area, as there's no point about fighting the endlessly respawning Apharmds near the turrets when you're in front of the turrets unless you want to farm kills for score [which you should forget about in a heal-less run], but you CAN dispose of the Apharmds that don't respawn, which are the ones that are before the first turret in the second area and the ones before the final two turrets in the third area respectively.
MISSION 5-4: Since you only have to fight VRs here rather than turrets, as well as move quickly to avoid landmines, the 747J actually fares better here than the 747HII. However, to even see the landmines on the floor, you have to stand still for a few seconds for them to glow on the floor - and even then you won’t notice any landmines that are way too far until you get closer to them and stand still.
A pretty annoying mission to get through without using heals, yet conceptually it isn’t as grueling as 5-3 - just make sure to help your partner cross reach the final area without taking hits from landmines [and hope to be lucky that it doesn’t die from fighting mechs], as it won’t trigger them on their own, but it will get hurt from the mines exploding if you activated them and they were nearby one.
The CPUs will, as usual by this point, get nasty to successfully land hits at, so beware of getting confident and leaving yourself open to stray attacks from the Vox and Temjins. On my succesful attempt, getting my partner to reach the final area with very little damage actually saved me, as he carried me HARD by fighting the CPU on the very end while I was on very little health.
MISSION 5-5: You have several corridors to run at, and most lead to square areas with a single enemy in them, but if you’re lucky, you can run into a static destroyable that ends the stage. According to TemYap’s AQ, the target’s location is randomized, and confirmed it can appear in a different place after a revisit, which is why I say it seems to be down to luck if you can complete the stage quickly or not. At least it seems you only fight one VR at at time most of the time, and even when you run into two, they all seems to have lowered health, so it is infinitely easier than most missions before this.
MISSION 5-6: This one is weird: You go through at least three or four rooms fighting two Raidens in each, but at least you get your health replenished after each room cleared.
The catch is winning against Gill and Ledon at the end - If your partner ends up with too little health from fighting them, Apharmd the Hatter will appear and interrupt the fight, ending the mission.
So if you want to consider victory against Gill and Ledon the proper mission completion, then you have to put some work to deal with at least one of them before the partner dies. You can use the Partner Target option to make it target the same VR as you, so you could potentially try to double attack Ledon to then only leave Gill as the sole target. Although unfortunately, you may still be bound to luck if either one gets a fatal blow on your partner that ends the mission.
Fortunately, since it is a multi-room mission, you can hit Retry while pausing to immediately try again before your partner dies. Also, if YOU die, you will get an unique dialogue [I guess?] and be prompted to retry or select another VR - so it seems Hatter only gets in the way if it is your partner who gets hurt too much.
Gill is evasive but most of the time will try to approach with melee attacks like a madman [do NOT underestimate him and think he will never use the laser though], so you'll want to try take him out first while making your partner target Ledon [it will often do this on its own if you target Gill, but if not, use the Pause menu and set SUPPORT VR TARGET to Another]. If you can take out Gill [and your partner doesn't lose too much health with Ledon, or even better, has dealt decent damage to him], all you have to do is take out Ledon and your mission is complete...although this also results in the crazed red Hatter appearing out of nowhere in the next mission briefing rather than having his dramatic entrance.
MISSION 5-7: COME OOOOOOOOOOOOOOOON
This is the fight against Hatter himself, which only looks kind of funny because of how he just appears here like crazy and with a red enemy color scheme instead of his default ally color [which means you can only fight him with his normal colors if you unlock him and then go to versus mode].
He's...TECHNICALLY dangerous, but his biggest weakness is his focus in trying to chase you to the end of the world just to slam you with melee attacks - otherwise it will use ranged weapons very few times. I could actually perfect him once with the 747J by keeping distance and using the bombs to deal damage...for 3 minutes. I'm sure it's possible to perfect him without taking that much time too [ernostar on Youtube has flexed that on that one VS NPC video], but if you don't want to play hit and run forever, you just have to try dash attacking when he's in range to try attacking you but just at the right time that you actually land the attack [too early and you'll either miss or Hatter will dodge, but too late and you're eating a knuckle sandwich].
MISSION 5-8: >:[
Four MLTN to defeat, each one in their own hallway full of hazards, whittling you down and ESPECIALLY your partner who doesn't have a clue about platforming decently, and every MLTN being in a somewhat cramped room while taking a while to defeat - I think this one may actually be impossible to no heal unless you are EXTREMELY resilient and skilled to dodge most of their attacks even on such small spaces, because otherwise it is a no go, and it is the ONE mission where I feel confident in admitting it may not be possible for most due to the low chance of dodging every attack from all four MLTN when most have crazy range and eventually also have to deal with big tracking orbs that hurt BADLY.
My personal best in this cheating garbage of a mission with a normal VR would be a single heal - and that's only because the partner also gets healed when you use a rescue disk [if they are alive], so that was a major reason why I had a chance to endure with just one heal.
When I eventually unlocked White Knight though, I could actually pull off the heal-less mission in Hard on my first try using it - the damage it deals is ABSURD enough to help you win in seconds, more so if the partner also tags in for some massive damage at these cursed MLTN things.
No Heal Mission 5-1 and 5-2 [Temjin 747J - Hard Difficulty]
No Heal Mission 5-3 [Temjin 747HII - Hard Difficulty]
No Heal Mission 5-4 [Temjin 747J - Hard Difficulty]
No Heal Mission 5-5 [Temjin 747J] and 5-6 [Temjin 747HII] - Hard Difficulty]
Mission 5-8 with one heal [Temjin 747H - Hard Difficulty] No Heal Mission 5-8 [White Knight - Hard Difficulty]Daimon Chaos - Episode 6
Read Details
So...this thing. To complete this Episode, you have to get 7 Daimon Fragments before the percentage maxes out. If you defeated the Rose Sisters on Episode 2 and then Hatter in Episode 5 though, you'll already have 2 fragments in advance, as each one will hand you over one for winning.
You can actually save anytime during this Episode and progress will be saved, such as saving after getting another fragment, losing to Rose Sisters in one of the areas [which will TAKE one fragment], reloading the save and then the fragment will be back.
Something that I caught on that also made this possible to complete without heals is that, while the fights before the area's boss are randomized, the boss will stay the same in every area as long as you keep reloading the same save.
So for example, if you save, enter the Moon Area, and encounter a MLTN in Control Saucer, then that means that anytime you reload THAT save and go to the Moon Area, it will ALWAYS be a MLTN variant awaiting there. Bosses will only get shuffled if you win or lose at any area, so you can be strategic to pick the boss you can handle better while trying and trying just to save when you actually beat it.
Any area you enter has to be completed in one go - no retries allowed in any of the fights, which is why you'll want to take advantage of savescumming if you KNOW a good boss awaits in an area and want to try a shot at it again.
With all of that said, I'd recommend the bosses you face are specifically Z-Gradt [it's only one so it's manageable], any MLTN but in Control Saucer [the Mars stage is far more cramped to maneuver around without taking hits] and then Daimon Arm specifically as a durable VR [and by this I mean specifically the Temjin 747HII and no one else - maybe Raiden or a long range Apharmd variant could be valid too, but by this point you already have the 747HII and it's like...the most decent deal between being faster than Raiden yet stronger than other Temjins in raw damage and durability]. The playable VR fights might be a crapshoot [or in Hatter's case, no reward], and Daimon Worm is a big mean bastard to beat AT ALL, so I'd recommend shooting for the three I mentioned if you really want to do it. If you're stuck with Daimon Worm appearing in every area you go for a moment for some reason though, I guess you'll just have to accept the loss and see if the areas changed it with something else.
No Heal Episode 6 [Temjin 747HII + Temjin 747J - Hard Difficulty]Unknown - Episode 7 [FINAL]
Read Details
And now...the end is near...there's a lot of insane stuff that's only survivable with a lot of practice to put a plan together...or because the Mission itself gives you some leeway to retry halfway instead of being booted back to menu - in one specific case it's both of them.
MISSION 7-1: This is actually the second mission I couldn't complete heal-less when I did the heal-less playthrough even with the 747HII - while the MLTN here are weaker to damage, you still have an absurdly low margin for error to complete this mission without healing, as you have to fight FIVE of them total as you play the stage: Two on the first area, then a platforming section, then three more in another area with holes. The only saving grace is having a wall in the first area to protect from projectiles [although the big orb of doom phases through it, so you have to keep moving], but otherwise you're for an extremely rough time. My personal best currently is just one heal - at least without using the White Knight [recently tried it again with it and could somewhat breeze through the mission without healing], but I still feel like this one HAS to be possible with the 747HII...only that I have to practically perfect the first three or four of those damn things before getting to the fifth and final one.
I'm sure I could do it with enough time and stubbornness, but back then, I skipped it because I wanted to see what the rest of the endgame was actually like.
MISSION 7-2: Thankfully, this one is more manageable since it's just fighting a bunch of Daimon Orbs to then get into a room with three more...and a Daimon Arm. It is only manageable if you bring the 747HII though, not only because its weapons can deal good damage fast + missiles for long distance to keep track of the ones that will spawn repeatedly on the first room, but because it is far more effective to win against the Daimon Arm at the end without healing.
MISSION 7-3: If you haven't learned how to work around the double Z-Gradt in Challenge Mode though, then you won't survive 7-3...because it is also against two Z-Gradts...AND YOU ARE ALONE. What's worse, they seem even more durable here in their gold phase than when you fought them in any previous missions [1-5, E-8, Episode 6], as the 747's Surfing Ram doesn't do as much damage, AND they will aim their cannon vertically if you try to jump over the beam - only way you can avoid it at all is to be close to them and move around them as they spin the beam [as they won't do a quick one or two spins with it here].
Despite the odds [and the two or three crates indicating you are expected to heal against this absurdity], if you can take down ONE Z-Gradt, then your winning chances rise by a lot, as you can use that destroyed Z-Gradt as a wall from the other one's projectiles [if it runs past it, just move to take cover with it again] until its vulnerable again. For raw damage and survivability, I did this with the Temjin 747HII, as usual.
MISSION 7-4: First room is once again fighting Daimon Orbs like in 7-2 until you're allowed to continue...and the second room is vs DAIMON WORM. If you have read that section, you'll get why this sounds horrible for a heal-less run...but the thing is that if you die against it, when you hit retry, YOU ARE RESPAWNED ON THAT ROOM AND NOT AT THE BEGINNING.
That is seriously the only reason why it is feasible to actually win this mission without healing [unless you're so stubborn or skilled to make it through both of these in a single visit], as you don't have to worry about repeating the first section every single time and having a full health bar for every Daimon Worm attempt. Having the 747HII available now can also make things easier, but you'll still have to put up a good fight to survive. Oh, and watch out for the Daimon Orb it drops when about to be defeated - unlike the Earth mission, here it will linger and attack after Worm dies...so make sure to not get Kaizo Trap'd by it.
Third and final room is having to destroy a giant cannon at the other side of the room while Daimon Orbs spawn. You can either play it safely dispatching the orbs and attacking the cannon from a distance until the orbs respawn again...or you could approach it from close to use more attacks - but since I somehow did this section on my first try, I can't guarantee if you get respawned here on retry or if you get sent back to Daimon Worm in the second room.
MISSION 7-5: Did you miss Bradtos from Oratorio Tangram? No? Too bad, you're fighting THREE VARIANTS OF IT HERE.
Similar to the previous mission, you can actually retry if you lose on the second and third rooms, and even switch your VR without being sent back to the beginning if you hit VR Select AFTER you lose [if you do it from pause menu, you'll get sent to the start, so do NOT do that].
While the the first one is basically Bradtos from VOOT and the second one has you jumping beams instead of dodging spread shots [in Hard mode it shoots five beams, while in Normal footage I only noticed three], you basically have to fight against both variants at the same time on the third room as separate halves.
That third room is where you need to do some serious work, dodging the homing lasers from the top half, then running away from the bottom half to avoid its stun lasers. It's random which one of them will use their vulnerable attack first, so you have to basically keep an eye on which one will open up for damage and attack accordingly. The top half will fire SEVEN lasers, so you can attack while moving between them until you know the seventh one is up to use your strongest attack, while the bototm half will do the spinning eye lasers, so I'd recommend attacking only after it finishes its attack as soon as possible [you can also attack BEFORE it starts, but you need to do it quickly to not get caught by it].
MISSION 7-6: The final mission of the game, against Tangram. Everything you have trained for and suffered all the way up to here will be tested- what do you mean I already won
So not only Tangram takes some serious damage from your attacks [I played with the 747 and the standing shots did their work fast], but also shuts down temporarily when you deplete her bar, leaving you to destroy the seals that are the target you need to destroy. There’s three at the floor and three at the ceiling that you reach by jumping high to flip gravity - your controls and view will be weird but that's all the obstacle there is to it. It’s kind of anticlimatic that she’s FAAAAAAAAR easier than so much other shit in this game, although maybe its meant to be symbolic with how this time you aren’t here to destroy her, but to free her. That...and be careful for this big area attack she can do at times [I think you dodge it by jumping to the ceiling or floor because it targets the floor you're standing at?].
Missions 7-1 without healing [White Knight - Hard Difficulty] Missions 7-2 to 7-6 without healing [Temjin 747HII + 747J - Hard Difficulty]Conclusion
Rewards? None, technically. The game DOES keep track of rescue disks only on completed missions as far as I can tell, but only shows them at the end. Since I did the playthrough in Hard, I got Guarayakha at the end, but you'll likely get more mileage out of the 747J and 747HII if doing a new game plus run to try getting the White Knight Temjin in Ultimate difficulty.
The only reward you can technically get from commiting to no healing in missions is that you can get more points and thus a better rank in the mission - although in some cases it seems to be better to heal maybe once just because the full health bonus is worth more than the heal penalty for healing once [but only once - heal twice or more and the health bonus will be nullified by the penalty].
I guess this may help if doing repeated runs in a save file just to increase your rank and eventually, maybe after two or three playthroughs[?], can unlock the Rose Sisters VRs legitimately due to the requeriment of defeating them with a high enough rank...and you can only keep your rank if you keep playing on the save file created after completing the game.
It was cool for the most part to push the game this much though, even if some missions really brought me to my limit in patience just for the no heal completion, making some BS moments far more evident, and even more annoyingly, feel the immediate frustration of something like Mission 5-8 being such an absurdly setup challenge that I couldn't feasibly beat it heal-less unless I were PERFECT at dodging the baloney of every single MLTN [I still don't know if White Knight AND playing in Normal may make it possible though - I saw Stratos is actually easier in Normal in another video because it only has three spinning eye lasers instead of five lol]BETA OR UNUSED MARZ STUFF
Disclaimer: Most of this stuff is found either in TCRF or by other researchers. Only thing I'm doing here is adding my thoughts about certain findings [and adding more context if possible] that happen to be interesting. Also, there will be some findings that are exclusively in the Taikenban build, although since there's no code published to access the Debug Menu in it on my own, anything shown from it here will be from those other sources.
Unused playable Jaguarandi from Virtual-On FORCE
Guarayakha was made with the ability of transforming into Jaguarandi for a limited time in Force, resulting in a legitimately playable version of Jaguarandi in that game (with some alterations, such as smaller size, an altered bomb and less spread beams). Despite MARZ being based off FORCE and Guarayakha returning, the transformation ability is nowhere to be seen.
But either as a carryover from porting the boss version over FORCE, or maybe a leftover from wanting to bring that back only to scrap it due to time constraints, THAT version of Jaguarandi is actually accessible in the game if you use an external cheat code that forces Jaguarandi. It is a separate ID from the boss version of Jaguarandi (which is also accessible, but is so massive it will obscure your screen most of the time).
Besides some melee attacks not working at all despite their animations playing (Left Weapon, Right Weapon, the air Close Combat move), this version seems to be fully playable and with its moveset from FORCE intact. It has this weird unique color scheme when used in Dramatic and Challenge mode, but if used in Versus mode, it will have the same colors as in Force (P1 Orange, P2 Blue, P3 Purple, P4 Pink).
Unplayable Temjin variant and other unused Virtuaroids
Of the handful of unused VRs in MARZ, the one that's most interesting besides playable Jaguarandi would be the Temjin 747AII, which reportedly can appear randomly in the game's attract mode, but is otherwise completely unaccessible, and you wouldn't know it exists at all if you don't happen to be lucky enough to see it there.
It seems to be functionally the same as the 747A in Force, down to having the usual attacks and even Blue Slider intact, but lacking someting like the rebound slash (CW Turbo) that was given to the new 747J. The 747AII is a model that only appeared in this game and isn't even mentioned in any official material, so it either was a weird easter egg left as a nod to FORCE, a Temjin that was meant to be granted to you in Dramatic Mode BEFORE the 747J, or may even have initially been the defacto Temjin of MARZ, but with how the 747J has been present since early previews, maybe the lost upgrade path theory is the closest one.
Unfortunately, most other unused Virtuaroids are either borderline or completely nonfuncitonal, besides two unused small MLTN variants (as only two out of four small MLTN get used). VOX Danny uses VOX Dan's model and only can do melee attacks (Danny WAS a VR in Force, so this seems like a broken leftover), while VOX Lan seemingly can only attack with a dash CC and nothing else (reusing VOX Lee's model, so this one must have been a slot for another disposable Vox like Lee and Loo that got scrapped)
Cut Four Player Splitscreen + iLink support
TCRF post mentioning OMAKE option with "4INT VS" and "Smash Bro. VS"The Taikenban prototype, when using a (currently undisclosed) debug menu code, has three extra options at the start menu. One of them is OMAKE, which includes two options ("4INT VS" and "Smash Bro. VS", difference between them unknown). While the TCRF article only alluded to these allowing "4-player games", a video I found by ほし showcasing this actually shows the options are for FOUR PLAYER SPLITSCREEN.
This is someting that's actually not present at all in the retail game (not even with the Debug Menu code), and four player splitscreen in Virtual-On would only be officially released with the 360 port of Force (and ONLY the 360 port, for some reason).
It is very fascinating to see 4P split was planned, or at least tested - but when you watch the video, you may see a reason why it got cut (for reference, the Taikenban performs smoothly when playing alone, but the framerate in this 4P mode is...questionable).Whether it was intended to be finished or not is a mystery, although the assumption that it may have been scrapped due to the performance (or lack of time to finish optimizing this mode), something likely when the Taikenban is just about two months before the final build according to TCRF. These being hidden in a debug-only OMAKE option (usually meaning "extra" in Japanese) rather than something available in a normal menu seems to also hint that it may have been a bonus thing planned to be used with limited stages or just some experiment the devs were doing that ended up scrapped.
The iLink support mention though is exclusively by one of the other options in the Debug Menu in Taikenban ("iLink VS"), but that option soft-locks according to TCRF, so it is either incomplete, completely nonfunctional or maybe hangs expecting a iLink cable - but in any case, there's nothing left of this in the retail game either. The SEGA AGES PS2 re-release of Cybertroopers Virtual-On, released a few years after MARZ, did get iLink Cable support though, so perhaps it was also intended yet scrapped for MARZ due to time constraints.


